New Student Technical Guide

Welcome to UNC Kenan-Flagler.  Please complete the following steps to ensure your device is properly configured for use at UNC Kenan-Flagler. If you need any assistance, please contact the IT Service Desk at itservicedesk@kenan-flagler.unc.edu, or by phone at 919-962-0792


Two Accounts

Kenan-Flagler account – KF username@business.unc.edu
  • Kenan-Flagler email
  • KFBS Canvas
  • MyKE Hub
  • Office 365
  • Zoom
UNC Onyen account – Onyen username@ad.unc.edu
  • Connect Carolina
  • UNC-Chapel Hill Virtual Lab (Crystal Ball & Arena)
  • Wireless Internet Setup – Eduroam
  • Carolina Print Hub Student Printing
Separate browser profiles Separate browser profiles should be made for each Microsoft 365 account you use, including Kenan-Flagler, UNC-Chapel Hill, personal, or your workplace.

Change Kenan-Flagler Account Passphrase

You should have received an email with your Kenan-Flagler username and a temporary password. You will need to change this temporary password before you can use it to access many of our services. To change your password:
  1. Go to https://myaccount.microsoft365.com
  2. At the Microsoft Sign in window, enter Your Kenan-Flagler Username @business.unc.edu
  3. Click Next
  4. Enter your Temporary password in the Password field, click Sign in 
  5. You will see a windows that says More information required click Next
  6. Follow the instructions to set up Multifactor Authentication with the Microsoft Authenticator app, and text message code.
    1. Note:  Sign up for 3 methods (like personal email) if traveling!
  7. Once you set up Multifactor Authentication, you will see an Update your password window. Enter your Temporary password (from your welcome email) in the Current Password field 
  8. Enter a password for your account. It has to be at least 17 characters.  You may use all lower-case letters to create a password, but you can also use capital letters, numbers or special characters if you wish.  
  9. Click Sign In
  10. You will be asked if you want to stay signed in, click no or yes 
  11. You will then be brought to your Kenan-Flagler Office 365 Landing page.

Log into Kenan-Flagler email

  1. Go to Kenan-Flagler Outlook Web Access
  2. Sign in with your Your Kenan-Flagler Username @business.unc.edu
  3. You should connect your email to Outlook, by following the instructions in the Configure Email in Outlook section below
NOTE: If you are using a Microsoft 365 account for personal or work use, we recommend logging out of the account in your browser and signing in with your Kenan-Flagler account when you need to switch between the two accounts.  When you are in the office portal, you can click on your initials or picture in the upper-right corner, click Sign in with a different account.  You will be brought to a screen that lets you sign into multiple accounts.  We recommend clicking on the three dots and signing out of the account that you are not currently using.

Log into MyKE

  1. Go to myke.kenan-flagler.unc.edu
  2. Sign in with your KFusername@business.unc.edu, KFBS passphrase, and multifactor option

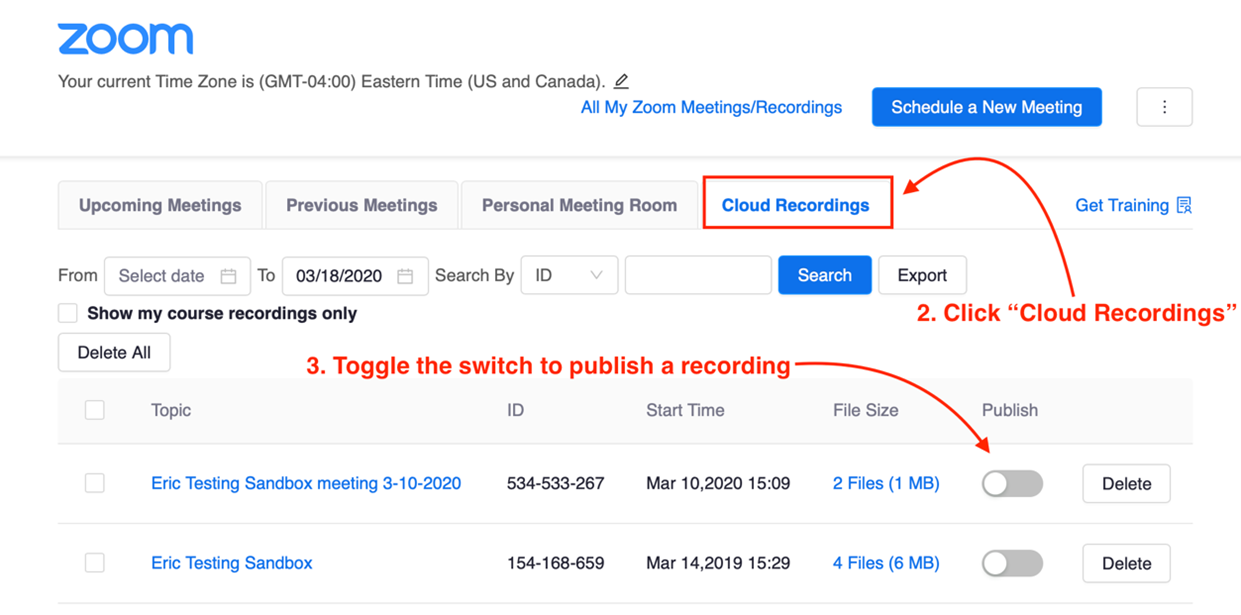
Create your Zoom account

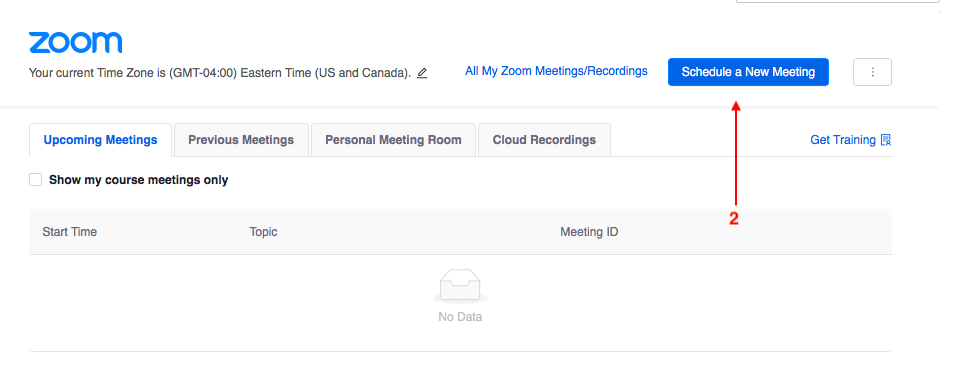
  1. To sign up for a Kenan-Flagler Zoom account, please do the following:
  2. Go to kenan-flagler.zoom.us
  3. click the Sign in button.
  4. Click on the Confirm your email address button.
  5. Check your KFBS email for the invitation.
  6. You will be brought to the Kenan-Flagler login page
  7. log in with your Kenan-Flagler username @business.unc.edu and your password

Download and Install the Zoom App

  1. Once you are logged into your Kenan-Flagler Zoom account, you can download the Zoom desktop app
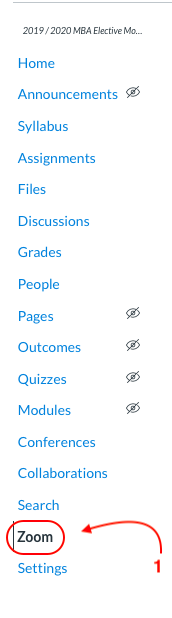
  2. Click on Resources in the top gray bar
  3. Click on Download the Zoom client
  4. Download and install Zoom client for meetings.  Run the installer
  5. Click the Sign in with SSO (key) button
    1. For Company Domain, enter kenan-flagler, click Continue
    2. You may be routed to the blue Kenan-Flagler sign in page, where you can sign in with Your Kenan-Flagler Username @business.unc.edu password
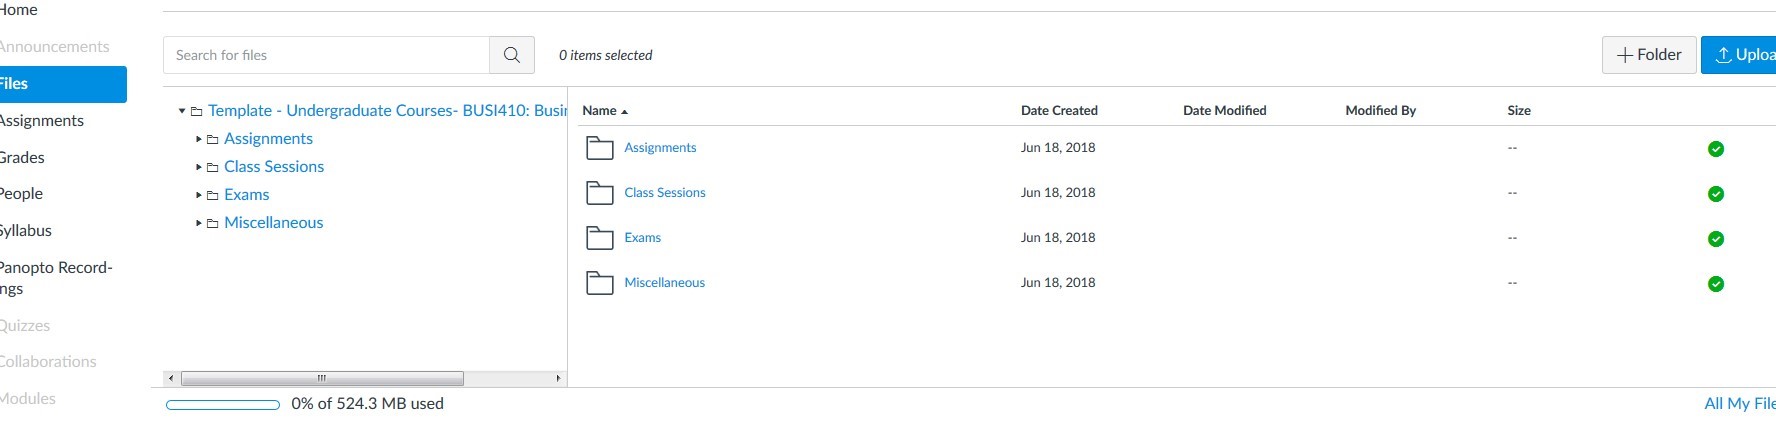
Log into Canvas

  1. Go to kenan-flagler.instructure.com
  2. Sign in with Your Kenan-Flagler Username @business.unc.edu
Canvas can also be accessed using an Android or iOS mobile device.  To download the app, see the guides here: Once you have opened the app click the “Find my school” button.  Search for “Kenan-Flagler Business School” (not UNC-Chapel Hill) and select it from the list that appears.  You will then be forwarded to the log in screen to continue.
 
Create your UNC Onyen
 
If you have not yet created your Onyen account.
 
Note:  Do not sign up for a UNC-Chapel Hill “Heelmail” email account unless you need access to main campus Office 365 resources.
  1. Visit https://onyen.unc.edu
  2. Select Create or Manage Onyen
  3. Follow the steps to create an Onyen account. You will need to know your PID. If you do not know your PID, please visit this website: http://www.pid.unc.edu/PIDLookup

Configure Mobile Devices

To configure Eduroam wireless internet on your mobile device, please choose the appropriate instructions this UNC help page. To configure your UNC Kenan-Flagler email on your mobile device, please choose the appropriate mobile setup instructions from the following Technical Guide. If you have any questions, please contact itservicedesk@kenan-flagler.unc.edu

Update Email Address in the UNC Directory and Connect Carolina

In order to order software from software.unc.edu and to receive general university email communications, you need to update your Connect Carolina email address:
  1. Visit https://connectcarolina.unc.edu
  2. Click on the Log in button
  3. Sign in with your Onyen username and password
  4. Select Personal Information > Contact Details
  5. Go to Business/UNC Email Address and Domain
  6. Enter Firstname_Lastname then select kenan-flagler.unc.edu from the drop-down menu
  7. Scroll to the bottom and click the Save button

Download Microsoft Office

You can obtain the full version of the Microsoft Office 365 Apps for Apple and Windows computer by going to https://microsoft365.com from your browser, and logging into Kenan-Flagler’s Microsoft 365 portal with your KF username @kenan-flagler.unc.edu.  On upper-left of the landing page, you will see an Install Office button.  You can install on up to 5 devices.
 
NOTE:  Office 365 is subscription-based and expires 180 days after you graduate, email the Service Desk for instructions on receiving a copy that follows you after you graduate.  You can download the Office Apps for Android and Apple iOS devices from their respective App Stores.  You will have to log into the apps with your KF username @kenan-flagler.unc.edu. UNC Student Stores (Carolina Computing Initiative) laptop purchases We recommend purchasing your student laptop at UNC’s Tech Shop, they include 3-year (4-year optional) warranties.  Lenovo laptops are preferred, which are more compatible with applications than Apple Macs: CCI Products – Carolina Computing Initiative (CCI)

Configure Email in Outlook

Windows Computers
 
The IT Service Desk recommends keeping your KFBS email separate from personal ones by using a separate Outlook profile.  Proceed by configuring a new Outlook profile in Windows.  If you’re opening Outlook for the first time, this happens automatically, otherwise :
  1. Restart your Windows PC
  2. Open Microsoft Outlook
  3. At the Welcome to Outlook window, click Next
  4. It will ask if you want to connect an email account.  Choose Yes.  Click Next
  5. Enter your name as you would like it to be displayed
  6. Enter your Kenan-Flagler email address: First_Last@kenan-Flagler.unc.edu
  7. Enter your Kenan-Flagler password twice
  8. Click Next
  9. You may see a window asking to “allow website to configure”. Check Don’t ask me about this again.
  10. Click Allow
  11. In the blue Kenan-Flagler window, enter your Kenan-Flagler username and password
  12. Click Log in
  13. You will then see a message that says, Your email account was successfully configured
  14. Click Finish
Apple Computers
  1. One Welcome to Outlook page, click Get started
  2. Note:  Apple prefers “KFusername@business.unc.edu” for email address.
  3. You will briefly see: ‘Redirecting you to your organization’s sign on page’
  4. Click Add Account
  5. On the Kenan-Flagler sign in page, enter your Kenan-Flagler username and password
Please contact us at ITServiceDesk@kenan-flagler.unc.edu if you have any difficulty.

Configure Wireless (Eduroam)

https://tdx.unc.edu/TDClient/33/Portal/KB/ArticleDet?ID=45

Install Printers

There are a number of printers available for student printing.  Please see the following Technical Guide for instructions on how to connect to these printers.

Email

If you are experiencing difficulty with the Outlook client, please use Outlook Web Mail at:  https://outlook.office.com/business.unc.eduIf you are having issues with your Outlook mail client, we recommend restarting your PC, if it hasn’t been restarted recently (two weeks at most), this especially applies to Kenan-Flagler Faculty & Staff PCs.  Also try logging in again & click OK and always trust certificates from Auto-discover if prompted.  If you are on a Windows PC, you may want to try and clear the cache from your browser.
Your email ID
As a member of the Business School you are provided with a UNC Kenan-Flagler email address. This email address remains active as long as you are an active employee/student and is deactivated upon departure or graduation. When you receive your account information, you will be provided with your email address and your email alias.Your email alias is in the form of FirstName_LastName@kenan-flagler.unc.edu.Ex: John Smith’s email alias would be John_Smith@kenan-flagler.unc.edu If you would like to request a name change to your alias (ie. John to Jack) you can do so by emailing your requested change to the IT Service Desk.Please click on an option below to see more information on how to configure it for your device, note that Outlook may take several minutes to sync and will be much longer on LTE or cellular connections instead of over WiFi.

INSTRUCTIONS


Microsoft Outlook for Windows Email Setup

  1. Restart your Windows PC
  2. Open Microsoft Outlook
  3. Click Add Account
  4. Enter your Kenan-Flagler email address: First_Last@kenan-Flagler.unc.edu
  5. Click Next
  6. Enter your Kenan-Flagler password
  7. Click Next
  8. You should see a message indicating your email account has been configured, Click Finish
If you see a message at the bottom of your Outlook window that says “connected to Microsoft Exchange, then your email should start loading. Please contact us at ITServiceDesk@kenan-flagler.unc.edu if you have any difficulty. 

Microsoft Outlook for Apple macOS

Note :  You must use your UserPrincipalName (KFUsername@business.unc.edu) to configure macOS Outlook in the Email Address field.  You will see your UPN frequently, it is used to sign into our Office 365 services and websites, but it has not replaced your email address, which is still First_Last@kenan-flagler.unc.edu.Outlook for macOS :
  • Click Get started on Welcome to Outlook page
    • If you have an account already configured, use File > Add Account
  • Email Address = KFusername@business.unc.edu
  • Password = Your Kenan-Flagler password
  • A window may appear that indicates the connection was redirected to outlook.office365.com, check the box to Allow.
Be patient while your account will begin to sync inside of Outlook for macOS. The initial syncing can take several minutes on WiFi and much longer over cellular.  Please let us know if you have any questions.

Mobile – Microsoft Outlook Android Setup

  1. Download the Microsoft Outlook Mobile App from the Google Play store
  2. Open Outlook for Android
  3. Click Get Started (or click on your initials > gear icon > Add account)
  4. Uncheck other email accounts (if they show and are checked) > click Skip (Bottom right)
  5. Enter your email address: First_Last@kenan-flagler.unc.edu > Click Continue
  6. On the login page displaying Your KF Username@business.unc.edu, enter your KFBS password.  Click Sign in
  7. After Tutorial, click on the Three Lines (top left), then the Gear (lower left)
  8. Turn off the ‘Focused Inbox’ feature if desired

Mobile – Microsoft Outlook iOS Setup

  1. Download Microsoft Outlook Mobile App from the App Store
  2. Open Outlook for iOS
  3. Click Get Started (or click on your initials > add account)
  4. Uncheck other email accounts (if they show and are checked) > click Skip (Bottom right)
  5. Enter your email address:  First_Last@kenan-flagler.unc.edu
  6. Click Continue
  7. You should see “Taking you to your organization’s sign on page”
  8. On the login screen with Your KF Username @business.unc.edu, enter your password.  Click Sign in
  9. After the Tutorial, Enable Notifications & Allow iOS Notifications
  10. After Tutorial, click on the Three Lines (top left), then the Gear (lower left)
  11. Turn off the ‘Focused Inbox’ feature if desired
Frequently Asked QuestionsOutlook no longer syncing or cannot send or receive emails?  We recommend removing and re-installing the mobile app from the Apple iOS or Android App Store on your cell phone, in some cases updates to the app itself can break the existing accounts.  In addition, restart your device every thirty days by completely powering it off and back on, which will often restore these connections.How do I configure Apple Mail or a different app for email?  Microsoft will soon limit the use of 3rd party applications that are not Microsoft Outlook.  KFBS IT only supports the official Microsoft Outlook apps for mobile devices, Apple macOS, or Microsoft Windows.

think-cell Chart Software

Create professional looking presentations for your classes fast using think-cell

Do you use PowerPoint to present in your classes? If so, think-cell – used by most consulting firms – might save you a significant amount of working time and enable you to create professional looking presentations for your coursework. Knowing think-cell could be a valuable skill as you enter the workplace since many employers, including top consulting firms and investment banks, use the software.think-cell is free to Kenan-Flagler Business School students, faculty, and staff. It takes just minutes to learn watching the short video tutorials available for each chart type. See below for helpful training resources and instructions on how to download think-cell.

How to learn more

For tailored think-cell support and self-service resources such as tutorial videos and a searchable user manual, visit https://www.think-cell.com/support

INSTRUCTIONS


How to Download and Install think-cell

Visit www.think-cell.com/download to download the software.

The think-cell license key is available on MyKE.

Conference/Study Room Cameras

Logitech MeetUp Cameras 

Some conference rooms and study rooms within the McColl Building are equipped with Logitech MeetUp cameras. These are all-in-one conference cameras with 120 degree field of view and integrated audio, perfect for small conference rooms and huddle rooms.Step into a huddle room and instantly start a video collaboration. MeetUp plugs into a USB port and simply works. Use any video conferencing software application and cloud service, including the ones you already use. 

Zoom at Kenan-Flagler

Zoom is a video communications software that is used for video and audio conferencing, collaboration, chat, and webinars across mobile devices, desktops, telephones, and room systems. Zoom is available for all UNC Kenan-Flagler faculty, staff, and students; it offers the ability to host online meetings of up to 300 participants. This is the primary video conferencing tool for all Undergraduate, MBA, MAC, MSM, and PhD business school students.

Direct any questions you have about your business school Zoom accounts to the following contacts.

General Information

  1. Navigate to the UNC Kenan-Flagler Zoom Portal
  2. Click the Sign in button to go to the UNC Kenan-Flagler login page
  3. Sign in with your Business Account
  4. Once you see your Zoom dashboard, you have completed your account setup
You can find download links to the various Zoom installation files and plugins at the Zoom Download Center if you would like to get everything set up before your first meeting. This includes links for the desktop application and mobile applications. If you have not installed the Zoom application prior to joining a meeting, Zoom will prompt you to download and install.
You can login to your Zoom account through the Web Portal or the Desktop/Mobile app.

To login using the Web Portal, follow the directions below:
  1. Navigate to the UNC Kenan-Flagler Zoom Portal
  2. Click the Sign in button to go to the UNC Kenan-Flagler login page
  3. Sign in with your Business Account
To login to the Zoom App using Single Sign On follow the Zoom Support SSO directions (The Company Domain will be Kenan-Flagler.zoom.us)
Please follow the instructions at this link to install the Microsoft Outlook Plugin for Zoom

Zoom is phasing out the previous Outlook Plugin, and it’s recommended to instead install the Outlook add-in. The plugin no longer works for MacOS..

Student-Specific Information

The Zoom Student Presentation Instructions provide a walkthrough for sharing PowerPoint presentations in a Zoom meeting. You can find additional instructions for sharing content in Zoom on the Sharing your screen or desktop on Zoom Support Guide
All Kenan-Flagler students have access to a Licensed Zoom account. Refer to the instructions under Getting Started to claim your Zoom Account and get prepared to join a meeting.

  • You do not need to be logged in to join a meeting where you have the link.
  • The URLs for meetings will be posted in your individual Canvas courses. Please note that the instructor may use a different link for each course or course session.
Follow these best practices when attending a virtual class session at Kenan-Flagler:

Video and Audio
  • Refer to instructor for video ON/OFF preferences
  • Unless directed otherwise, mute audio to minimize distracting background noise
  • If you are unable to connect to audio via a computer, use the provided phone numbers to dial in via phone
Environment
  • Avoid distracting or inappropriate backgrounds
  • Avoid environments that may contain excessive background noise
  • Ensure the environment is well lit at you are visible on camera
  • Reposition yourself if you notice any shadows, glares, or visual distractions
Decorum
  • Try to arrive a few minutes early to the meeting to setup or troubleshoot any issues
  • Refer to instructors on preferences around asking questions or stepping away from your device
  • Familiarize yourself with meeting controls to be prepared for interactive or discussion activities
  • Use your discretion when posting comments or messages to the public chat group
  • Be aware of on-screen behaviors as some sessions may be recorded and posted

Faculty-Specific Information

Purpose
We have heard from students in both surveys and in focus groups that there needs to be greater consistency across all Canvas courses. They identified key components that would help them navigate to their course materials more efficiently and to ensure that they don’t miss anything. Below are the standards that the students and the Undergraduate Business Program agreed on.

Home/Syllabus
  • Include course time/location and instructor office hours/contact info at top
  • Include link to full (static) syllabus → make sure to state in the syllabus that this is a static document and any class/ assignment adjustments will be reflected only on the Canvas site.
  • Individual class sessions and assignments will auto-populate in Course Summary below.
  • Set Syllabus page to be displayed as Home for the course.
Home/Syllabus

Files
  • Include folders for “Assignments”, “Class Sessions”, “Exams”, and “Miscellaneous”.
  • Within Assignments, have a separate folder for each graded element.
  • Within Class Sessions, have separate folders for each class session with titles starting with 01, 02, … 11, 12, … 24, … so that they are sequenced appropriately.
  • All materials for a given class session (slides, spreadsheets, electronic readings, etc.) should be stored in that folder for that class session.
  • .pdf files are preferable to .docx files.
  • Add additional folders as necessary (or delete folders if not applicable.
Example of the Main Files Page Main Files Page
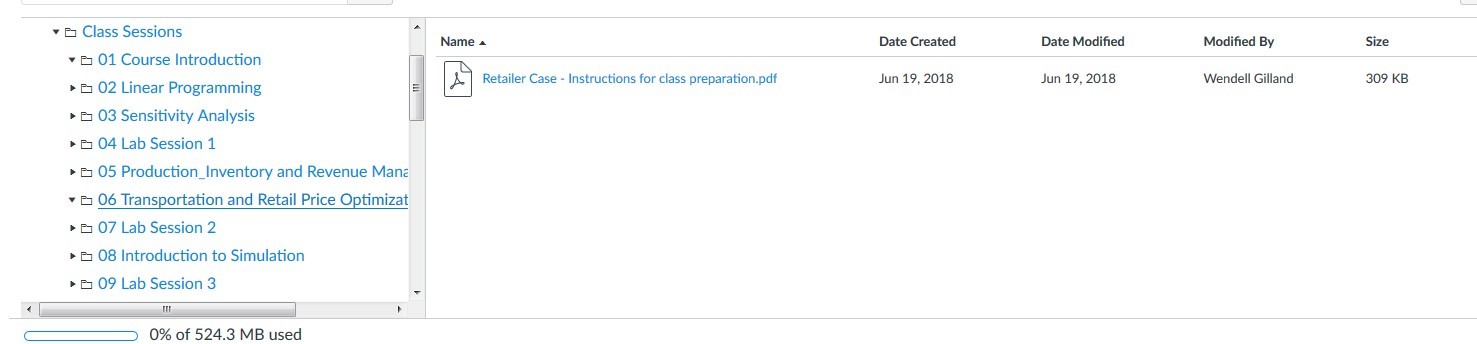
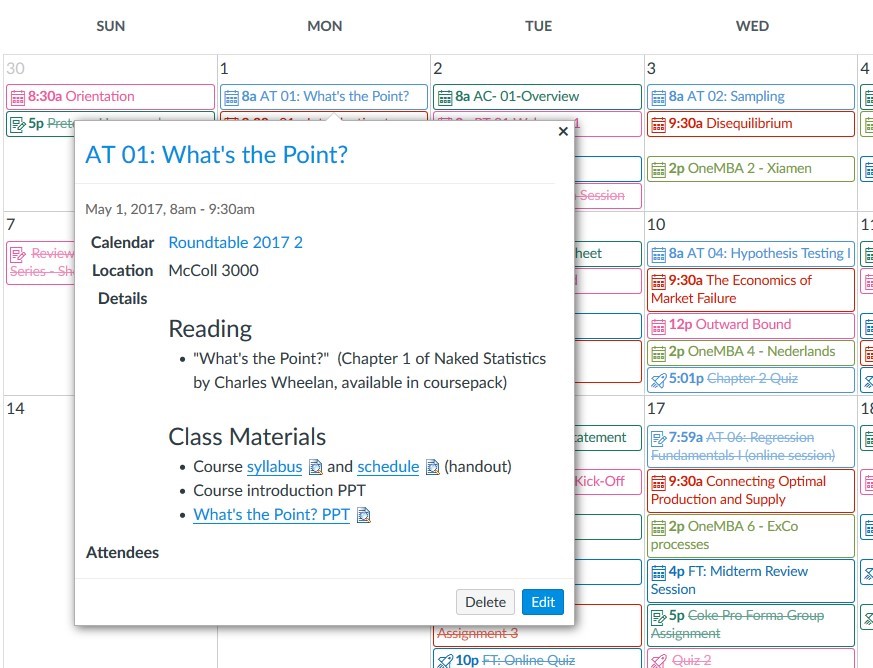
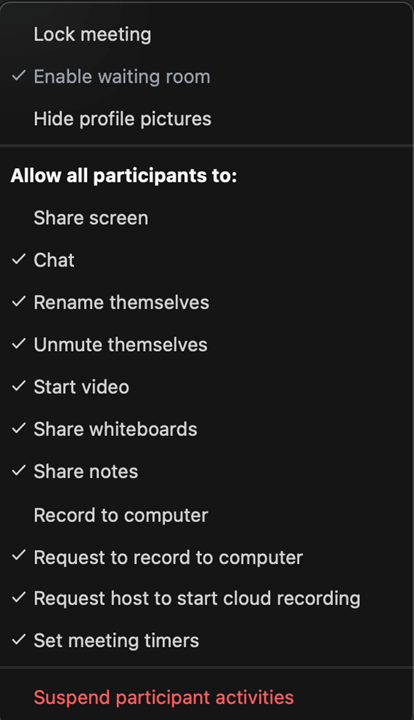
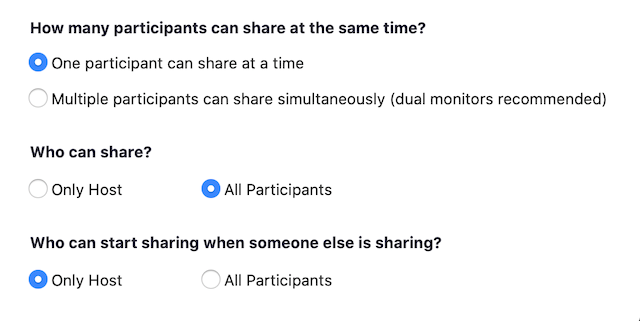
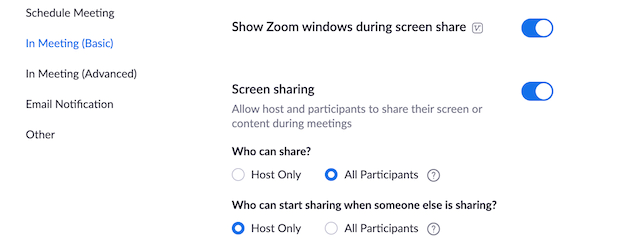
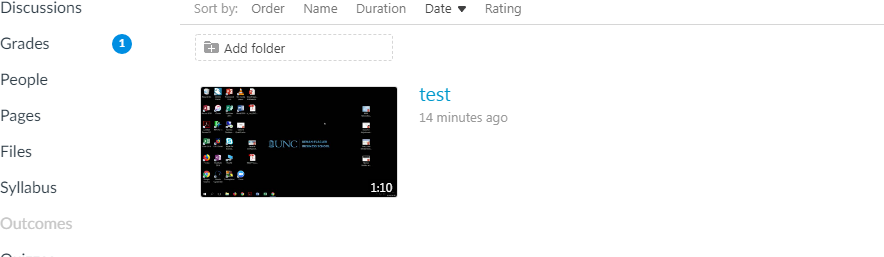
Example of the Individual Class Sessions Individual Class Sessions Files

Assignments
  • Have a separate Group for each type of assignment.
  • Assign weights to each Group of assignments. This will auto-create a grading summary on right side of home page of course.
Here are the step by step instructions on weighting course grades: https://community.canvaslms.com/docs/DOC-10059-415267002
  • Have a separate Assignment for each graded element of course.
  • Assign point value for each assignment consistent with how assignment will be scored.
  • Assign due date/time (section specific, if needed) so it shows up on Calendar.
  • If using Quizzes, they should be a group within Assignments.
Here are the step by step instructions to create an assignment: https://community.canvaslms.com/docs/DOC-9873-415267003 Assignments

Grades
  • After grading a student submission, enter score into Canvas.
  • Put a disclaimer about grades in Canvas and/or the syllabus letting students know that the grades in Canvas are not the official grade for the course (e.g., “Final course grades determined at discretion of professor (i.e., overall score of 90+ may not guarantee/be required for an A or A-)”).
Grades

Calendar
  • Create an Event for each class session indicating the topic of that day’s class. Then within the event, put links to the appropriate files (pdf’s, spreadsheets etc.)
  • Include instructions for advance prep (readings, discussion questions, etc.) that students are expected to complete prior to class.
  • “Use different date for each section” if teaching multiple sections so it will appear correctly on the students’ calendar.
  • Be sure you are adding to the correct calendar if teaching multiple courses.
Here are the step by step instructions to create a calendar event: https://community.canvaslms.com/docs/DOC-12797-415241296 Calendar
Zoom is a video communications software that is used for video and audio conferencing, collaboration, chat, and webinars across mobile devices, desktops, telephones, and room systems. Zoom is available for all UNC Kenan-Flagler faculty, staff, and students; it offers the ability to host online meetings of up to 300 participants

To get started, Navigate to your Canvas course:
    1. Click Zoom on the Canvas Course Navigation

    2. Click Schedule a New Meeting inside of Canvas
    3. Select your meeting settings:
      • Topic: Title for the meeting
      • Description (optional): This allows you to set a description for the meeting
      • When: Date and starting time for the meeting
      • Duration: How long the meeting lasts
      • Time Zone: This should be set to EST since our courses take place in EST
      • Recurring Meeting: This will allow you to schedule multiple meetings at once
      • Registration: Registration should not be checked for course meetings in Canvas
      • Video: It’s our recommendation that video be set to OFF by default for both Host and Participant
      • Audio: This should be set to Both
      • Meeting Options: Mute participants on entry
      • Record the Meeting Automatically in the cloud should be used for all course meetings.
  1. Click Save; your meeting will now show up on under Upcoming Meetings
  2. The students will have access to this page by clicking the Zoom tab in their course and will see the same view. This is also where they will access the cloud recordings.
Consider hosting a low-stakes online test session or connecting with colleagues to test your login, troubleshoot technical issues, and get used to the Zoom interface. Send students to the Zoom test and provide them with instructions to make sure that they are ready to go before your first official session; this will give students a chance to notify you if they have issues when setting up Zoom.
  • Test and Familiarize yourself with the platform in advance.
  • Arrive early enough to work out technical difficulties.
  • Have a backup plan in case problems occur (Inform students of the backup plan ahead of time so they can remain on task if technical issues occur).
If you are receiving “Your connection is unstable” messages in Zoom or notice stutter/distortion in your video and audio feeds, you are most likely experiencing a bandwidth issue. Below are some suggestions to make sure you have a stable connection and help minimize bandwidth use by Zoom.

Make sure you have a stable connection:
  • If you are using wireless, make sure that you are close enough to the access point and have adequate network connection on your device.
  • Make sure there are no large files being downloaded on your device or any others that are connected to the same network you are utilizing Zoom on.
  • Minimize use of other services that may utilize bandwidth while on the meeting, such as streaming services and online multiplayer video games.
If the above suggestions didn’t help, follow these suggestions to minimize bandwidth usage in Zoom:
  • Disable HD video on Zoom, moving to Standard Definition video should reduce the amount of bandwidth required to transmit video
    1. In your desktop Zoom client, click Settings (the gear icon).
    2. Click Video in the left-hand menu.
    3. In the My Video section, uncheck the box beside Enable HD if it is checked.
  • If connection issues persist after disabling HD video, consider turning off video completely and only utilizing it when necessary. Ask participants to turn-off video unless required.
  • Consider calling into the conference audio by phone instead of joining via computer audio, this will reduce bandwidth requirements by moving all audio handling to your phone.
  • Only utilize Screen Sharing when necessary and consider turning off video while using it.
  • Consider recording asynchronous content and sending it out to students; you can complement this with Zoom drop in hours to allow students to ask questions without the bandwidth usage of a full class session.

Virtual Courses or Sessions at Kenan-Flagler

During a meeting, the host or co-host can quickly enable or disable certain settings from the meeting controls toolbar to secure the meeting and minimize disruption; this includes locking the meeting, enabling waiting room, and suspending participant activities. The host and co-hosts can also view the security features this meeting was scheduled with while in the meeting.
Follow the instructions below to use In-Meeting Host Tools during your meetings:
  1. Start a Zoom meeting
  2. Click Host Tools.

    In-Meeting Host Tools
  3. Use this menu to enable or disable meeting features and participant settings:

    Host Tools List

You can find detailed descriptions for these options on the Changing security settings in a Zoom meeting support article
By default, KF Zoom accounts are set to only allow host to share. Hosts can change this setting within a meeting or across all future scheduled meetings on their Zoom Account.

Changing Your Screen Sharing Settings in a meeting with the Host Tools Button in meeting
  1. Click the Host Tools Button
  2. Click Screen Share to turn on Participant Screen Sharing (this will close the pop-up box)

    In-Meeting Host Tools
  3. You can click the Host Tools button again to make sure Share Screen now has a check mark to the left; Screen share is now turned on.
Changing sharing settings in a meeting:
  1. Click the arrow next to Share Screen. Share screen
  2. Click Advanced Sharing Options.
  3. Click the radio button for All Participants.Advanced sharing options
Change share settings for your Zoom account:
  1. Sign in to the Zoom web portal.
  2. In the navigation panel, click Settings.
  3. Under In Meeting (Advanced), click the option for All Participants.Zoom account share settings


Find more information for participant share settings at Zoom Support via the Enabling screen sharing for participants in Zoom meetings support article
Remind students of student conduct information at the start of each class session and let them know you will exercise your responsibility as an instructor to mute those who are disruptive or otherwise inappropriately interrupt classroom operations. You may want to email the class the link to the Kenan-Flagler Honor code and the University Student Code of Conduct https://catalog.unc.edu/policies-procedures/honor-code/Consider adding a similar statement to your Canvas syllabus
Mute a Participant
  • Click the Manage Participants button in the Zoom toolbar at the bottom of the Zoom window.
  • Click the Mute button to the right of the participant name.
Lock Your Meeting
  • Once all your participants have joined the room, you can prevent others from entering it.
  • Click the Manage Participants button in the Zoom toolbar at the bottom of the Zoom window.
  • Click the More button in the lower right of the participant panel.
  • Select Lock Meeting.
  • Confirm the selection.
Remove a Participant from a Zoom Meeting or Webinar
  • Click the Manage Participants button in the Zoom toolbar at the bottom of the Zoom window.
  • Click the More button to the right of the participant.
  • Click Remove.
  • Confirm the selection.
  • After removing the participant, acknowledge the disruption, apologize to the class and continue with instruction with remaining participants.
Should a disruption occur, mute or quickly remove the attendee.If the participant is enrolled in the class, email the student following the session, clarify why the student was muted or removed, and remind them of appropriate conduct and expectations, and the disciplinary approach you will pursue.
To get started, Navigate to your Canvas course:
  1. Click Zoom on the Canvas Course Navigation
  2. Click Cloud Recordings inside of Canvas
  3. Toggle the publish switch to make a recording available to your students
As a licensed user, you have access to reports. Only meetings you’ve hosted as a licensed user (a paid user type) have reporting available.

Note: If a meeting was scheduled before you were licensed, but hosted after the license, then you will have reporting, but scheduling and hosting before the license will have no reporting available.
  1. Sign in to the Zoom web portal.
  2. In the navigation menu, click Reports.
  3. Click the Usage Reports tab.
  4. Click Usage.
  5. At the top, use the following functionalities to sort the data by meeting:
    • Search by time range: Select a time range (within a month) using the From and To fields, then click Search.
    • Search by meeting ID: Enter the meeting ID in the search box, then click Search.
  6. Locate your meeting, then click the participant count (number) under the Participants Source column.
    A list of internal and external meeting participants will appear. This will show you a list of meeting participants, including join and leave times.
  7. (Optional) Export the attendee list as a CSV file.
You can use the features of Zoom to guide different types of interactive activities and offer some variety in online sessions; this will keep sessions interesting and offer

Sharing Your Presentation in Zoom:

  1. Open your PowerPoint presentation on your computer
  2. Join the Zoom Session
  3. Click the Share Screen button located in your Zoom tool bar.
  4. Select your PowerPoint presentation in the prompt, and click the Share button to start sharing:
  5. Use the Slide Show button in PowerPoint to begin presenting

Screen annotation

Zoom has basic annotation tools (text box, free form draw/pen, shapes, and highlighter) that you can use to guide students or explain a concept. Access these tools by selecting the Annotate option when you’re sharing your screen.

Non-Verbal Feedback

To provide nonverbal feedback or reactions to the host of the meeting:
  1. Join a Zoom meeting as a participant.
  2. Click the Reactions button.
  3. Choose from the following icons or click • • • to choose from a full set of emojis. Click the icon again to remove it.

    • Clapping Hands
    • Thumbs Up
    • Heart
    • Tears of Joy
    • Open Mouth
    • Party Popper (Tada, Celebration)
    • Yes
    • No
    • Slow Down
    • Speed Up
    • I’m away*
    • Raise Hand / Lower Hand
The icon will appear in your video panel and next to your name in the participants list.

*Note: The coffee cup “I’m away” nonverbal feedback requires the desktop client for Windows, macOS, and Linux; version 5.7.3 or higher.

Learn more about participant controls in a meeting.

Setting the skin tone for your reactions
  1. In the Zoom client, click your profile picture and then click Settings.

  2. In the General tab, select your reaction skin tone.


Managing nonverbal feedback and meeting reactions (hosts) Nonverbal feedback and meeting reactions will be displayed in each participant’s video panel, as well as next to their name in the participants panel. Click the Participants button to see a full list of participants and their nonverbal feedback and meeting reactions.
In the participants list, you can view and manage feedback using these features:
  • If a participant clicked on a nonverbal feedback or meeting reaction icon, you’ll see that icon beside their name.
  • The number above each nonverbal feedback or meeting reaction icon shows how many participants have clicked on that icon.
  • If a participant clicked Raise Hand, you can lower their hand by hovering over their name and clicking Lower Hand.

  • To clear all nonverbal feedback at once, click Participants, then, then Clear All Feedback.
  • Emoji (meeting) reactions will disappear after 10 seconds, while raise hand and nonverbal feedback, such as Yes, No, Slow down, and Speed Up, will be persistent and must be manually removed by the participant or host.

Verbal Feedback

You can instruct students to use the “raise hand” feature to indicate questions or when they would like to add to a discussion; this allows students to remain muted until they would like to speak and prevents unnecessary background noise from interrupting the session.

Chat

Using the chat tool allows students to interact with the session, activity, and each other; it even offers some advantages over large classroom settings:
  • Get large numbers of responses to a question immediately, and use these responses in real-time to drive discussion.
  • Chat is especially useful to take in questions and answer them in order.
Think about how, when, and where you want to allow students to engage in chat.

Breakout rooms

You can use Zoom’s breakout rooms functionality to facilitate group discussion or have students work. As the instructor, you can join breakout rooms, broadcast messages to the breakout rooms, and end the breakout sessions when it is time to regroup. Keep in mind that breakout rooms will not be recorded.Notes:
  • Only the main session room will be recorded
Self-selecting a breakout room
Zoom breakout rooms allow you to split your Zoom meeting in up to 100 separate sessions. These can be split automatically, or manually, and allow participants to self-select breakout sessions. Pre-assigned breakout rooms are not recommended as they often do not catch all students and lead to instructors having to manually assign many students during the meeting.

More information and a video guide for Zoom Breakout rooms can be found on the Managing meeting breakout rooms support article
You can present slides to further explain a topic that was only touched upon in class or if several students ask the same question. Sessions can be recorded and shared for later viewing.
If you usually do “board work” as part of a class session, you have a number of options.
  • Use the Whiteboard feature (this often works best on a tablet computer rather than a trackpad).
  • Try the basic annotation tools (text box, free form draw/pen, shapes, and highlighter) to guide students or explain a concept.
  • Create a PowerPoint slide or other simple backdrop file on which you can type notes, and share those notes using Screen Sharing. Note that one advantage of this and other approaches here is that the boards can persist and be distributed to the students after class.
  • Prerecord the illustration as a video, then play it during class.

Reserve a Study Room

Make a Reservation

Study Room Reservations can be made by going to the following link:https://kenan-flagler.resourcescheduler.com/Reserving study room with Microsoft OutlookNote: Requires New Outlook
  • Open Calendar
  • Open New Event
  • Click Find a Room
  • Use the panel on the right to select building, date/time.
If you need assistance with making a reservation or receive an error, email Kenan-Flagler Facilities at:  facilities@kenan-flagler.unc.eduThere are 34 group study rooms on the first floor of McColl that can be reserved by UNC Kenan-Flagler students. These rooms have big screen monitors and whiteboards, so they are great for group work. The study room reservations are all managed by the individual programs while the hardware within the rooms is maintained by the IT Department.If you experience any issues with reservations or would like to submit a feedback on the reservation process, please contact your program.

Guidelines

  • Rooms can be reserved by all ALL UNC Kenan-Flagler students: Undergraduate Business, MAC, EMBA, MBA, and MSM.
  • Advanced booking – reserve rooms up to 14 days ahead of time
  • For groups only – not for individual study – there are individual study rooms in the sitting area outside of the Graduate Student Lounge
  • Reservations have priority, please leave courteously
  • Two hour time limit per group
  • Leave rooms clean

Use of the Monitor in the Room

  • You can connect to the Monitor with the available USBC cable.
  • If you have any issues with the study room technology, please contact itservicedesk@kenan-flagler.unc.edu.

Remote Desktop Connection

You must have VPN to access a computer from off campus.  ITS provides instruction for installing and configuring Cisco AnyConnect VPN software for use with UNC’s network available here: https://uncch.service-now.com/sp?id=kb_article_view&sys_kb_id=c8665ad2db1bfb886cf47104399619d4Please note that you will need your Onyen to view UNC’s VPN clients.To remote into a computer at UNC Kenan-Flagler the computer you are trying to access must be a Windows PC that is added to the Business domain, it must be powered on, it must be connected to the internet, and you must know the name of the computer you are trying to access.  Without meeting these requirements, you will not be able to connect to your office computer.

Apple iOS and MacOS

Cisco AnyConnect VPN software is available from UNC’s shareware site on OS X and MacOS, on mobile devices it is available directly through the App Store. In addition to the VPN, you will need the Microsoft Remote Desktop connection App available through the App Store.To connect remotely to a PC, open the Remote Desktop app, then you  create a connection by using the “+” sign in upper-right hand corner to Add New, select Desktop, enter “yourpcname.business.unc.edu” for PC Name, enter “business\BusinessUsername” for Add User Account, then  “BusinessPassword” for your Password.  Save the connection.

Windows PC

Open Remote Desktop and use your PC’s full name “example.business.unc.edu”.  It will ask for your credentials when you connect for the first time, use “business\BusinessUsername” for your Username, and your Business account password for your password.  In addition, you may need to use the Show Options button on the lower-left hand side and visit the Advanced tab to change the “If server authentication fails” dropdown from “Warn me” to “Connect and don’t warn me” if you are unable to connect.

Parking Gate App

You can use the OneCard GET Mobile App to access the parking gates and the doors that you are provisioned for.NOTE:  If you have an old OneCard that does not have an expiration date, you will have to go to the OneCard office to get a new OneCard.  Instructions for setting up the GET Mobile app can be found here:https://onecard.unc.edu/mobile-one-card/
 

Faculty Panopto Recordings

Faculty Self-Recording Instructions

The following instructions will help instructors self-record a video in Panopto that will be stored in that course’s Panopto folder in Canvas. 
  1. Navigate to Canvas course page you would like to record to. Panopto Tutorial Instructions
  2. Click on Panopto recordings link in navigation panel.  If not activated click on settings, navigation and enable Panopto recordings link. Panopto Tutorial Instructions
  3. In the Panopto window click on the arrow in the upper right hand corner. Panopto Tutorial Instructions
  4. Click Download Panopto if you do not have it installed.
    Panopto Tutorial Instructions
  5. Follow install prompts.
    Panopto Tutorial Instructions
  6. Panopto recorder will launch, close it and go back to the Panopto window. Panopto Tutorial Instructions
  7. Click Create, then record new session. Panopto Tutorial Instructions
  8. Launch recorder. Panopto Tutorial Instructions
  9. Primary Sources-Choose Video and Audio sources.
    Panopto Tutorial Instructions
  10. Secondary Sources can be a Powerpoint or main screen. Panopto Tutorial Instructions
  11. Start recording when finished navigate back to Recorder and stop. Panopto Tutorial Instructions
  12. After your video processes you can access it through Canvas. Hover over the video to access the editor and make any necessary edits. Panopto Tutorial Instructions

Request Scheduled Section Recordings

To request a scheduled section recording, please fill out the following form at least two business days in advance of the requested recording date: https://a.kenan-flagler.unc.edu/applications/portal/media/section-recording

JMP Pro

Note:  Failure to update Connect Carolina with your KFBS email address will prevent successful order!  If the Software Distribution website seems stuck, the University may have no email address on file for you, as this procedure populates the UNC Directory with your KFBS email address.Update KFBS Email in Connect Carolina:https://connectcarolina.unc.edu
  • Login with your UNC-Chapel Hill Onyen to update your email to your KFBS email (Firstname@kenan-flagler.unc.edu) inside the Self-Service > Update Personal Information > Contact Info > Business Email/UNC Email Address and Domain.
    • Use the first field to add Firstname_Lastname, then the Dropdown menu to select ‘kenan-flagler.unc.edu’
JMP Download Instructions from UNC Software Distribution:https://software.unc.edu
  • Login with Onyen
  • Click ‘Shop as a Student’ on the left, type ‘JMP’ in the search bar and pick Mac or Windows version
  • Check your email for Order Confirmation and Order Fulfilled emails from UNC Software Distribution
  • If you do not receive the emails within an hour or two, check Spam/Junk folders and contact Software Distribution directly at (919) 962-2000 or email at software@unc.edu
Microsoft Windows installation:Note:  You must extract/unzip the file otherwise the install will fail.  Open the file from your browser’s recent downloads or File Explorer > Downloads.
  • Open the ZIP file, and use Extract All button at the top
  • Note the location of the extracted folder and keep the “Show extracted files when complete” checked
  • The unzipped folder should open, locate the ‘JMPPRO17x64.exe’ inside the following folder path: ‘/JMP_Pro/17_X/Windows’
  • Double-click the .EXE file to begin installation
  • Click ‘Next’ when prompted, ensure Excel add-in is selected
  • Be patient, can take several minutes to install
Apple macOS installation:
  • Double-click ZIP file inside Finder > Downloads, named ‘JMPPRO17X64’ or similar.
  • Go to the new folder inside the following folder path: ‘JMP > JMP_Pro > 17_X > Macintosh > JMP-Install.dmg’
  • JMP then mounts to your Mac, if not visible on Desktop open Finder > Devices on the left
  • Double-click ‘JMP Pro 17.PKG’ file and follow prompts
  • After opening you may be asked for SID license file, go back to JMP folder to locate text file under SID_Files
JMP License Renewal:https://license.unc.edu (Software Distribution License)
  • Sign in with Onyen and Onyen password
  • Select JMP and your version number depending on what you have installed
  • Refer to UNC’s FAQ on licence SID file installation:
UNC JMP License FAQ